- What "Zero Downtime" Actually Means When You Migrate WordPress to a New Host
- Before You Migrate WordPress to a New Host: The Pre-Flight Checklist
- Four Ways to Migrate WordPress to a New Host, Compared
- Migrate WordPress To a New Host: The cPanel-to-cPanel Migration Method, Step by Step
- The Migrate WordPress To a New Host Hosts-File Trick: Test the New Server Before You Touch DNS
- The DNS Cutover: Point Your Domain With Zero Downtime When You Migrate WordPress To a New Host
- Don't Skip Email: MX Records and Dedicated IP After You Migrate WordPress To a New Host
- Post-Migration Verification: The 8-Point Zero-Downtime Checklist To Use When You Migrate WordPress To a New Host
- How AHosting's Free cPanel-to-cPanel Migration Actually Works (Hint: It's The Easiest Way To Migrate WordPress To a New Host)
- The Zero-Downtime Migration Sequence at a Glance
- Frequently Asked Questions: Migrating WordPress to a New Host
- Can you migrate a WordPress site to a new host without any downtime?
- Plugin migration vs cPanel to cPanel WordPress migration: which is better?
- How long does it take to migrate WordPress to a new host in 2026?
- Will migrating my WordPress site to a new host hurt my Google rankings in 2026?
- Do I need to reinstall plugins and themes when AHosting migrates my WordPress site?
- Should I lower my DNS TTL before I migrate WordPress to a new host in 2026?
- Does AHosting really migrate WordPress sites for free with zero downtime?
- What is the hosts file trick for testing a migration before DNS cutover?
- How does AHosting's free dedicated IP protect email deliverability after I migrate hosting?
- Manual migration vs a managed migration to a new host: which is lower risk?
To migrate WordPress to a new host with zero downtime, build and verify the full copy on the new cPanel server first, then switch DNS only after testing. The order of operations protects uptime, not the transfer tool.
The safest way to migrate WordPress to a new host is to treat the DNS switch as the last step, never the first. In practice, a zero-downtime migration means your old site keeps serving every visitor while you build and verify a complete copy on the new server behind the scenes. Only when that copy is confirmed working do you point your domain at it, so no visitor ever hits an error page. This guide walks through a cPanel-to-cPanel WordPress migration from pre-flight checklist to DNS cutover, including the hosts-file trick most tutorials skip, and it draws on real migration data from a host that runs these transfers for free every day.
What “Zero Downtime” Actually Means When You Migrate WordPress to a New Host
Zero downtime means you can migrate WordPress to a new host while your website stays reachable for every visitor throughout the move, with no maintenance page and no error screen. Fundamentally, this works because a migration need not happen in place. Instead, both servers can hold identical copies of your site at once, and you decide exactly when traffic shifts. That decision is a single DNS change, and it takes effect in minutes when you prepare correctly.
Notably, the thing that breaks uptime is almost never the file transfer itself. Rather, it is pointing your domain at the new server before that server is ready, or shutting down the old server too early. As a result, the discipline that delivers zero downtime is sequencing: copy, test, then cut over.

Before You Migrate WordPress to a New Host: The Pre-Flight Checklist
Before you migrate WordPress to a new host, prepare three things: a documented copy of your current stack, a lowered DNS TTL, and a verified match of server requirements on the destination. Specifically, skipping any of these is what turns a clean transfer into an afternoon of troubleshooting. Together, the sub-steps below take under an hour.
First Requirement: Document Your Current WordPress Stack
First, record everything the new host must match: your WordPress version, PHP version, active theme, every plugin and its version, your permalink structure, and any custom wp-config.php lines. Additionally, note whether your email lives on the same cPanel account or with a separate provider, because that fact decides how you handle MX records later. In practice, this five-minute inventory prevents the most common post-migration surprise: a plugin that silently needs a PHP extension the new server does not load by default. For the official baseline, the current WordPress server requirements list the minimum PHP and database versions your destination must meet.
Second Requirement: Lower Your DNS TTL Before Anything Else
Second, before you migrate WordPress to a new host, lower the TTL on your A record to 300 seconds at least 24 to 48 hours before the migration window. Critically, the old TTL value must fully expire before the new, shorter one takes effect, which is why this is the very first task on the timeline rather than the last. Consequently, when you finally point your domain at the new server, DNS resolvers worldwide pick up the change within minutes instead of the 24 hours a default TTL can impose. Ultimately, this one preparation step is the most commonly skipped task in a zero-downtime migration, and skipping it is the single biggest cause of the “some visitors see the old site, some see the new one” confusion.
Third Requirement: Match PHP and Resource Limits on the New Server
Third, before you migrate WordPress to a new host, confirm the destination cPanel account meets or exceeds your current environment: enough disk space, the right PHP version, adequate databases, and sufficient memory. For example, if your old host ran PHP 7.4 and the new default is PHP 8.4, some older plugins may need updating first. Fortunately, on a quality host this is a non-issue: AHosting WordPress accounts default to PHP 8.4 with a 256MB memory_limit, and customers can raise that to 512MB through cPanel’s PHP INI Editor without opening a support ticket. Similarly, if concurrency is a concern, our guide to how many WordPress PHP workers your site actually needs explains how to size the destination against real traffic, and a VPS with dedicated workers is the right destination when sustained concurrency exceeds a shared plan’s ceiling.
Four Ways to Migrate WordPress to a New Host, Compared
There are four practical ways to migrate WordPress to a new host, and they trade control against convenience when you migrate WordPress to a new host. Broadly, migration plugins are easiest for small sites, a cPanel-to-cPanel transfer preserves the most, manual command-line migration offers total control, and a host-managed free migration hands the job to specialists. The comparison table below lets you pick before you start rather than halfway through.
| Method | Best for | Preserves email & cron? | Skill needed | Typical transfer time |
|---|---|---|---|---|
| Migration plugin (Duplicator, All-in-One, Migrate Guru) | Small sites under 1GB, no email on cPanel | No (files + database only) | Beginner | 15-30 min |
| cPanel-to-cPanel full transfer | Any cPanel-to-cPanel move | Yes (whole account) | Intermediate | 10-30 min |
| Manual CLI (rsync + mysqldump + WP-CLI) | Large or complex sites, developers | Yes, if scripted | Advanced | 30-90 min |
| Host-managed free migration | Anyone who wants it handled | Yes (verified by the team) | None | Under 20 min (95% of AHosting moves) |
Method One: The Migration Plugin Route
Migration plugins package your files and database into an archive you restore on the new host, all from the WordPress dashboard. Typically, tools like Duplicator or All-in-One WP Migration suit sites under 1GB that do not host email on the same account. However, they move only what WordPress can see: files and the database, not email accounts, server cron jobs, or cPanel settings. In other words, a plugin migration is a WordPress migration, not a hosting-account migration, and that distinction matters most when your mailboxes live on the server you are leaving.
Method Two: The cPanel-to-cPanel Full Account Transfer
A cPanel-to-cPanel WordPress migration transfers the entire hosting account at the server level, including email, databases, cron jobs, and configuration. Consequently, it best preserves a real-world site, and it is exactly what hosts use when they migrate for you. Because both ends speak the same cPanel format, the transfer runs server to server without touching your local machine. As such, it is faster and less error-prone than juggling archive files, which is why the next section walks through it step by step.
Method Three: Manual Command-Line Migration
Manual migration copies files with rsync, exports the database with mysqldump, and rewrites URLs with the official WP-CLI search-replace command, giving developers total control. In particular, this route shines for very large sites where a plugin would time out, or for a domain change requiring a careful database search-and-replace that correctly handles serialized data. That said, it demands comfort with SSH, MySQL, and file permissions, so it is overkill for a straightforward cPanel-to-cPanel move. For teams already managing infrastructure at the command line, though, it is the most flexible option.
Method Four: The Host-Managed Free Migration
A host-managed migration hands the whole job to the destination host’s specialists, who run the transfer and verify it before handing back a working site. Frequently, this is the lowest-risk option because the people doing it migrate sites every day and catch edge cases most owners miss. On AHosting, this service is free on every plan with no per-site limit. Later in this guide, we detail how that managed process runs and why 95 percent of these transfers finish in under 20 minutes.
Migrate WordPress To a New Host: The cPanel-to-cPanel Migration Method, Step by Step
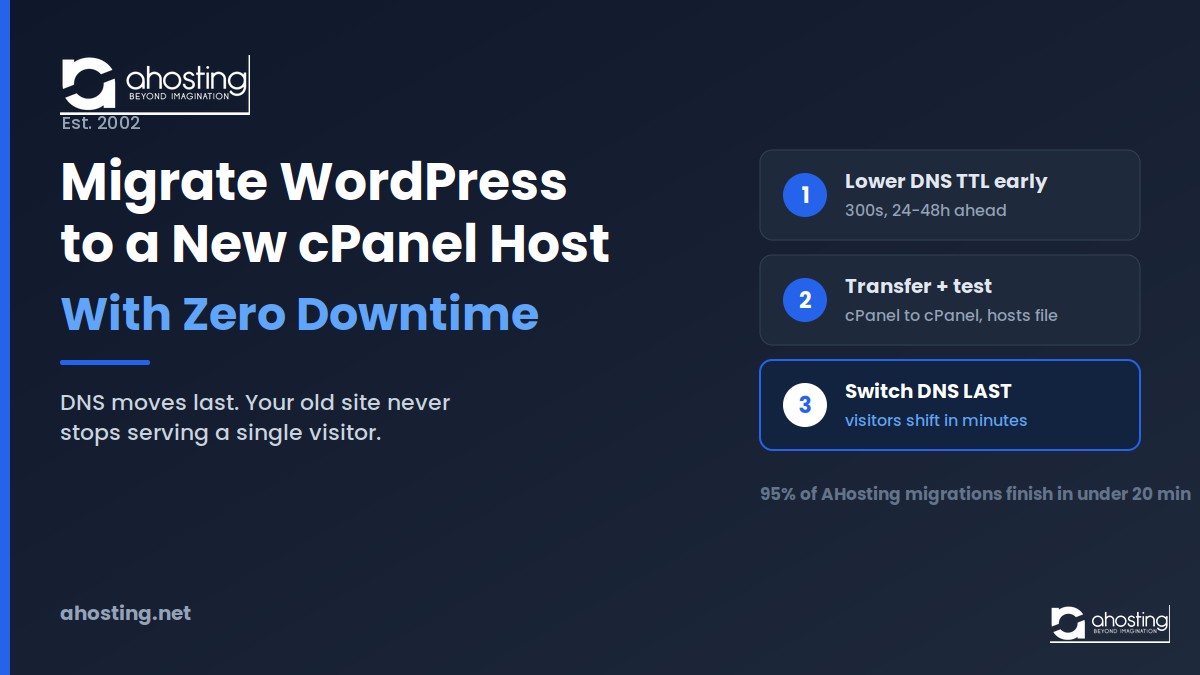
The cPanel-to-cPanel method to migrate WordPress to a new host follows five ordered steps: prepare the destination, transfer the account, sync final changes, test the new server, then cut over DNS. Importantly, DNS comes last. This ordering is the entire secret to zero downtime, because your live site never stops serving traffic until the new copy is proven.
First Step: Provision the Destination cPanel Account
First, create the account on the new host and confirm it meets the requirements you documented, matching or exceeding the PHP version, database count, and disk allocation. Then note the new server’s IP address, which you need for both the hosts-file test and the eventual DNS cutover. At this stage, do nothing to your live domain; the new account simply sits ready.
Second Step: Transfer the Account Server to Server
Second, move the account, either as a full cPanel backup restored on the new server or a direct WHM account transfer between servers. Because the transfer runs server to server, it does not touch your local machine and completes in minutes for most sites. Meanwhile, your old site keeps serving every visitor, unaffected, because your public DNS has not changed yet.
Third Step: Run a Final Sync of Recent Changes
Third, capture anything that changed after the initial transfer. For instance, if your site takes orders or form submissions, briefly enable maintenance mode during a low-traffic window and run a final sync so no data is stranded on the old server. Otherwise, for a low-change brochure site, you can skip this step. Either way, the goal is a destination copy that mirrors production before you test it.
Fourth Step: Test on the New Server Using the Hosts File
Fourth, test the migrated site on your real domain without changing public DNS, using the hosts-file trick in the next section. Click through key pages, submit a test form, log in, and confirm caching and security plugins behave. Notably, this is the phase where most migrations quietly succeed or fail, so do not rush it. Only once everything passes do you move to the final step.
Fifth Step: Cut Over DNS and Monitor
Fifth, to finish the migration, point your A record at the new server’s IP. Because you lowered your TTL in advance, propagation completes in minutes, and visitors shift seamlessly to the new server. Afterward, keep the old account running for at least seven days as a rollback safety net, and if you changed domains, flush caches and confirm URLs with WP-CLI before decommissioning the old server. That final patience is what separates a truly zero-downtime migration from one that mostly worked.
The Migrate WordPress To a New Host Hosts-File Trick: Test the New Server Before You Touch DNS
The hosts-file trick maps your domain to the new server’s IP on your computer only, letting you preview the migrated site on the real domain while the world still sees the old server. Essentially, your operating system checks its local hosts file before asking public DNS, so a single line overrides DNS for your machine alone. As a result, you get an accurate preview, on the correct domain, with zero risk to live traffic.
In practice, you add a line pairing the new server’s IP with your domain to the hosts file, save it, and load your site. On Windows the file lives at C:\Windows\System32\drivers\etc\hosts, and on macOS or Linux it is /etc/hosts. Then you test exhaustively: pages, forms, login, checkout, and admin. Afterward, remove the line so your machine returns to normal DNS resolution. Above all, this step is what lets you promise zero downtime with confidence, because you have already watched the new server serve your real domain correctly.
The DNS Cutover: Point Your Domain With Zero Downtime When You Migrate WordPress To a New Host
The DNS cutover is a single change to your A record, and its smoothness depends entirely on the TTL you set days earlier. Specifically, both servers hold identical content during the propagation window, so visitors resolving to either one see the same working site. As the official Moving WordPress documentation notes, keeping URLs and structure identical is what lets search engines follow the move without disruption. Consequently, there is no moment of unavailability, only a brief period where traffic gradually shifts from old to new. The timing table below shows why lowering TTL early is non-negotiable.
| Timeline stage | Default TTL (86400s / 24h) | Prepared TTL (300s / 5min) |
|---|---|---|
| 48 hours before cutover | No action taken | Lower A-record TTL to 300s |
| At cutover | Change A record | Change A record |
| Propagation time | Up to 24 hours | Roughly 5-60 minutes |
| “Split-brain” window | Up to a full day | Minutes |
| Rollback speed | Up to 24 hours | Minutes |
Furthermore, when you migrate WordPress to a new host that already runs through Cloudflare’s proxy, you have an even faster path: changing the origin IP in the Cloudflare dashboard takes effect in seconds for all proxied visitors, no DNS propagation required. As it happens, AHosting sits behind Cloudflare, which makes this near-instant origin swap available on our stack. Either way, the principle holds. Both servers stay live, and you keep the old one running until propagation is confirmed complete.
Don’t Skip Email: MX Records and Dedicated IP After You Migrate WordPress To a New Host
Email is the most commonly broken part of any move to migrate WordPress to a new host, and whether it breaks depends on where your mail actually lives. Specifically, if your MX records point to a separate provider such as Google Workspace or Microsoft 365, your email is unaffected by the move because MX routing is independent of your website’s A record. In contrast, if mail is hosted on the same cPanel account you are leaving, you must migrate the mailboxes and verify the new server’s mail configuration.
Moreover, deliverability after a migration hinges on the new server’s IP reputation and reverse DNS. In particular, a clean dedicated IP with correct PTR records keeps your mail out of spam folders, whereas a shared IP inherited from a bad neighbor can sink it. Notably, AHosting includes a free dedicated IP on every WordPress plan, which is why our deep dive on why your host is the root cause of email deliverability problems treats the dedicated IP as the foundation of post-migration inbox placement. Therefore, confirm reverse DNS and SPF, DKIM, and DMARC records on the new server before you consider the migration finished.
Post-Migration Verification: The 8-Point Zero-Downtime Checklist To Use When You Migrate WordPress To a New Host
After you migrate WordPress to a new host and cut over DNS, run a systematic verification pass before you declare the migration complete, because the post-cutover phase is where quiet failures hide. Specifically, a site that loaded perfectly on the hosts-file preview can still trip over SMTP settings, SSL certificates, or CDN configuration once real DNS resolves. Therefore, work the interactive checklist below, then read the practical list that follows it.
WordPress Migration Readiness Checker
Tap each item you have completed. The bar fills as your migration approaches zero-downtime ready.
0 of 8 complete
- Documented current stack: PHP version, plugins, theme, permalinks
- Lowered DNS TTL to 300 seconds at least 24-48 hours ago
- Confirmed destination PHP, disk, and database limits match or exceed
- Transferred the account and ran a final sync of recent changes
- Tested the new server on your real domain via the hosts file
- Verified email, MX records, and dedicated-IP reverse DNS
- Confirmed SSL certificate is active on the new server
- Cut over DNS and kept the old account live for 7 days
Beyond the checker, confirm a few things directly. Load your homepage and three deep pages with a hard refresh, submit a real contact form and confirm the email arrives, check the SSL padlock shows no mixed-content warnings, and log into wp-admin to confirm plugins are active. Finally, verify global propagation with a tool like whatsmydns.net before you cancel the old plan.
How AHosting’s Free cPanel-to-cPanel Migration Actually Works (Hint: It’s The Easiest Way To Migrate WordPress To a New Host)
AHosting migrates WordPress sites for free on every plan, with no per-site limit and zero downtime, completing 95 percent of transfers in under 20 minutes. Specifically, the process is simple for the customer: after signing up, you submit a request through the support portal and provide your current host’s login or cPanel access. From there, the team runs the cPanel-to-cPanel transfer server to server, which is why it is fast and complete rather than a files-only plugin copy.
Crucially, the team ensures zero data loss, preserves all email and databases, and verifies everything works before the migration is considered complete. In addition, this applies whether you move a single site, a multisite network, or a reseller account with dozens of client sites. Because the destination runs LiteSpeed with LSCache, a free dedicated IP, and CloudLinux CageFS isolation, sites frequently land faster than they left, and every plan carries a 30-day money-back guarantee. If you have simply outgrown shared hosting and are weighing a VPS upgrade, the same free migration applies to that move as well, so switching tiers never means a manual rebuild.
Why the Account-Level Approach Beats a Plugin Copy
For context on why the account-level approach matters when you migrate WordPress to a new host, remember that a real WordPress site is more than its files. It is mailboxes, cron jobs, databases, and cPanel configuration, none of which a plugin archive captures. That is the core reason a specialist-run account transfer preserves what a self-serve plugin move leaves behind, and it is why handing the job to the team is the lowest-risk path to zero downtime. The same logic scales up: moving to a bare-metal dedicated server when you have outgrown shared infrastructure uses the identical zero-downtime cutover, just with more horsepower on the destination.
The Zero-Downtime Migration Sequence at a Glance
Visually, the entire method to migrate WordPress to a new host reduces to one rule: DNS moves last. As the sequence below shows, every action happens on the new server while the old one keeps serving traffic, and only the final arrow shifts visitors across. Overall, if you internalize this single diagram, you already understand why the migration is safe.
Frequently Asked Questions: Migrating WordPress to a New Host
Can you migrate a WordPress site to a new host without any downtime?
Yes, you can migrate a WordPress site to a new host with zero downtime by building and testing the full copy on the new server first, then switching DNS only after verification. Specifically, your old site keeps serving traffic the whole time, because visitors are never routed to the new server until it is confirmed working. Ultimately, the order of operations protects uptime, not the transfer tool. See the five-step sequence above for the exact ordering.
Plugin migration vs cPanel to cPanel WordPress migration: which is better?
Specifically, a plugin migration packages your files and database from inside WordPress, while a cPanel to cPanel WordPress migration transfers the whole hosting account, including email, cron jobs, and databases, at the server level. Furthermore, the account-level transfer preserves settings a plugin never touches, which is why hosts that run free migrations use it. For a small brochure site with email hosted elsewhere, a plugin is fine; for anything with mailboxes or cron on the same account, cPanel-to-cPanel wins.
How long does it take to migrate WordPress to a new host in 2026?
Typically, the file and database transfer for a site under 1GB takes 15 to 30 minutes, though the full window including DNS propagation runs 1 to 4 hours in 2026. In practice, AHosting completes 95 percent of managed migrations in under 20 minutes because the account transfer runs server to server. Notably, the remaining variable is DNS propagation, which you control by lowering your TTL in advance.
Will migrating my WordPress site to a new host hurt my Google rankings in 2026?
Generally, migrating to a new host does not hurt rankings if you keep the same domain, URLs, and permalink structure, because search engines index content and URLs rather than server IPs. However, downtime from a botched cutover or broken redirects can cause temporary dips. Therefore, the zero-downtime method here is also the SEO-safe method. As a safeguard, re-verify in Google Search Console and resubmit your sitemap after cutover.
Do I need to reinstall plugins and themes when AHosting migrates my WordPress site?
No, you do not need to reinstall plugins or themes when you migrate WordPress to a new host, because both plugin-based and cPanel-to-cPanel transfers move your complete installation with every setting intact. Additionally, you only reactivate caching and security plugins you disabled beforehand. The one exception is a PHP version change on the new host, which the pre-flight checklist covers by documenting your current version first.
Should I lower my DNS TTL before I migrate WordPress to a new host in 2026?
Yes, lower your DNS TTL to 300 seconds at least 24 to 48 hours before you migrate WordPress to a new host, because the old TTL value must expire before the lower one takes effect. Consequently, when you finally point your A record at the new server, resolvers pick up the change in minutes instead of a full day. Indeed, this single step is the most commonly skipped preparation task, and the timing table above shows exactly how much rollback speed it buys you.
Does AHosting really migrate WordPress sites for free with zero downtime?
Yes, AHosting migrates WordPress sites for free on every plan with zero downtime and no per-site limit, whether you move one site or one hundred. Specifically, you submit a request through the support portal, provide your current host credentials, and the team runs the cPanel-to-cPanel transfer server to server. Moreover, they verify email, databases, and the live site before the migration is complete, backed by a 30-day money-back guarantee.
What is the hosts file trick for testing a migration before DNS cutover?
Essentially, the hosts file trick maps your domain to the new server’s IP on your own computer only, so you can preview the migrated site on the real domain while the world still sees the old server. In practice, you add one line to your local hosts file pointing your domain at the new IP, test everything, then remove it. As such, it confirms the new server works before you route a single visitor to it.
How does AHosting’s free dedicated IP protect email deliverability after I migrate hosting?
Specifically, AHosting includes a free dedicated IP on every WordPress plan, which keeps your mail off a shared IP that a bad neighbor may have flagged with spam filters. Because deliverability depends on IP reputation and correct reverse DNS, a clean dedicated IP is the foundation of inbox placement after you migrate hosting. Therefore, confirm the new IP’s PTR record plus SPF, DKIM, and DMARC before you consider the migration finished, and remember MX routing is separate from your website’s A record.
Manual migration vs a managed migration to a new host: which is lower risk?
Generally, a managed migration is lower risk than a manual one, because specialists who migrate sites every day catch the edge cases, like serialized-data URLs and missing PHP extensions, that trip up a manual move. In contrast, manual migration gives developers total control but concentrates all the risk on one person’s checklist. As a safety net either way, the zero-downtime method never shuts down the old server until the new one is verified, so a failed cutover rolls back in minutes by repointing your A record.